How to Apply For A Japanese Electronic Visa (JAPAN eVISA): Ultimate Guide
Although citizens of many countries must apply for a visa before coming to Japan, the Japanese government has facilitated this by launching the e-visa system.

Table of contents
- Who is eligible to apply for a Japan visa online?
- What visa type is available online?
- Documents required for Japan E-visa application
- How to fill in the Japan E-visa application form?
- How to upload a photo for the e-visa application form?
- Japan visa photo requirements
- Japan E-visa photo tool
- What to do if there’s a mistake in my application form?
- How to pay a Japan electronic visa fee
Let's explore the details of the Japanese e-visa application in this guideline.
Who is eligible to apply for a Japan visa online?
National and foreign residents of the following countries can apply for a Japanese eVisa:
Brazil, Cambodia, Canada, Mongolia, Saudi Arabia, Singapore, South Africa, Taiwan, United Arab Emirates, United Kingdom, United States of America.
However, citizens of Canada, Singapore, Taiwan, the United Arab Emirates, the United Kingdom, and the United States of America do not need visas to come to Japan already. Foreigners who legally reside in these countries are allowed to apply online.
People convicted of a crime in any country or deported are not allowed to get a Japanese visa.
Please note that you can enter Japan with an electronic visa only by plane.
What visa type is available online?
Currently, there is only one visa category available: a tourist one. It is a Temporary Visitor visa allowing you to come to Japan for recreation. The length of stay is up to 90 days. It is a single-entry visa. If you want to return to Japan, you must reapply for a new one.
Remember that with an electronic visa, you can only enter Japan by plane.
The visa terms explicitly state that you are not allowed to have any remunerated activity during your stay in Japan.
All other visa types like business, student, work, or transit are unavailable, Neither are multiple-entry visas. To obtain one, you must apply in person.
The Japanese e-visa validity is three months. You must enter Japan within this period; otherwise, you must get a new visa. Once activated upon entry, it allows you to stay in Japan for 90 days.
Documents required for Japan E-visa application
You will need electronic copies of these documents:
- An identity photo matching the Japanese visa photo specifications;
- Passport;
- Itinerary with flight information;
- Document proving your financial solvency;
- Schedule of stay;
- Hotel information.
Also, you may need:
- Parental consent form for minors;
- Letter of authorization (if you are a proxy).
In some cases, you might need some additional documents.
All the files must be up to 2 MB in size. They can be any of these formats: PDF, TIF, JPG (or JPEG, it is the same format), PNG, GIF, BMP, or HEIC.
Remember to renew your expiring passport before applying for the visa. If you already have a visa for your old passport, but the passport itself has changed, you will have to withdraw the visa and apply for a new one using your new passport data.
How to fill in the Japan E-visa application form?
You are allowed to apply for the visa no earlier than 3 months and no later than seven days before the start of your trip.
First of all, create an account on the https://www.evisa.mofa.go.jp/index#flow website. You will need an email address. Enter it, choose your language (only English is available), your citizenship, and your country of residence. Then you will receive an email with an activation link.
You are allowed to fill in the forms for your family members or other people using your own account.
The form consists of 7 steps. Let’s have a look at them.
In the first step, you must agree to the terms and conditions of issuing the visa.
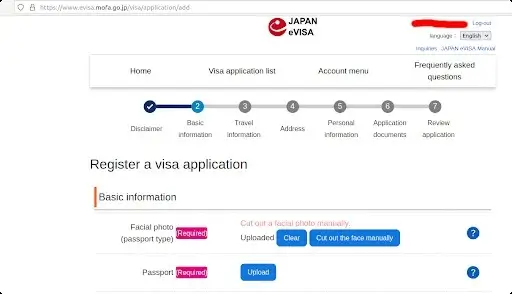
In the second step, Basic information, you must enter your passport data. You are required to upload a scan of your passport bio page. If the scan is of poor quality, it will be rejected. After you upload a good one, all your data will be automatically auto-filled in proper blanks like your name, surname, etc. Also, you will be asked about the data of your spouse and information on your occupation and purpose of visit (which can be only the tourist one). Also, you are asked to upload your photo, and we will discuss this step in the next subtheme.
Step 3 is the Travel Information. You will be asked about the dates of your stay, details of your flight and hotel.
Step 4 is the Address. Give details on your current address and employer. Concerning the latter, you must only tell their name, address, and telephone number. No more information is needed.
Step 5 is personal information. You must answer several questions about whether you are engaged in criminal activity. And also, answer whether you are the principal applicant or apply on someone else's behalf.
Step 6 is Application documents. Here you are asked to upload all the documents except your passport. In the opened windows, you can upload up to 3 papers for one document category.
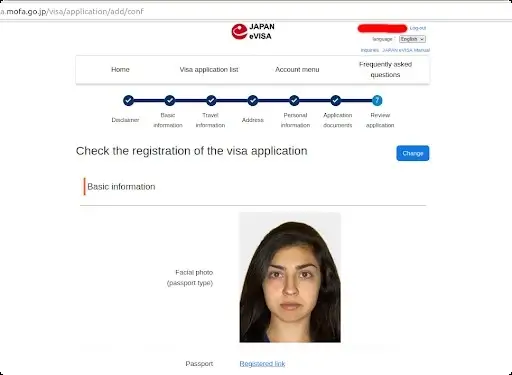
Step 7 is the Review application. All your entered information appears here, so you have an opportunity to recheck it. On the top, you will see your uploaded photo.
Then press Next, and on the next page, after selecting the newly created form, press Submit.
When your visa is issued, you will get an email notification about that. Have your “Visa insurance notice” ready when you cross the Japanese border.
Generally, your Japanese e-visa processing time is 5 working days (in a week) as long as there are no flaws in the form, like an absence of documents or mistakes.
How to upload a photo for the e-visa application form?
It is the first thing that the firm expects from you. Prepare your picture in advance: after you’ve done it, press the Upload button, and choose your photo. After it is uploaded, the note Uploaded and Cut out a facial photo will appear manually. Press the Cut out the face manually button.
In a new window, you will have to highlight your face and the image’s edges using a red frame. Expand it so it covers most of the photo by dragging its corner. Make sure that the red frame does not exceed your photo borders; otherwise, you won’t be able to crop it. Then press the Execute Cut Out button. If the frame is out of the image, you will get the "The specified area is out of the image" message. Don’t be confused by this message. In this case, just shrink the frame a little.
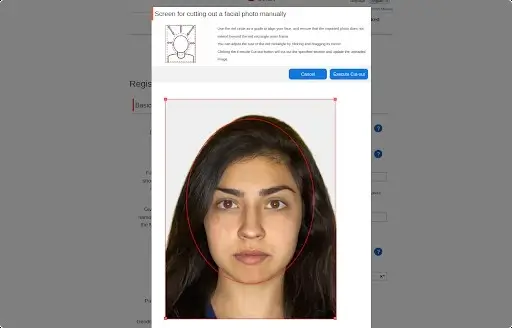
Then the Uploaded inscription will appear. If you have accidentally uploaded the wrong pictur, just press the Clear button, and upload the correct one.
Once you’ve done this step, uploading your passport pages awaits you.
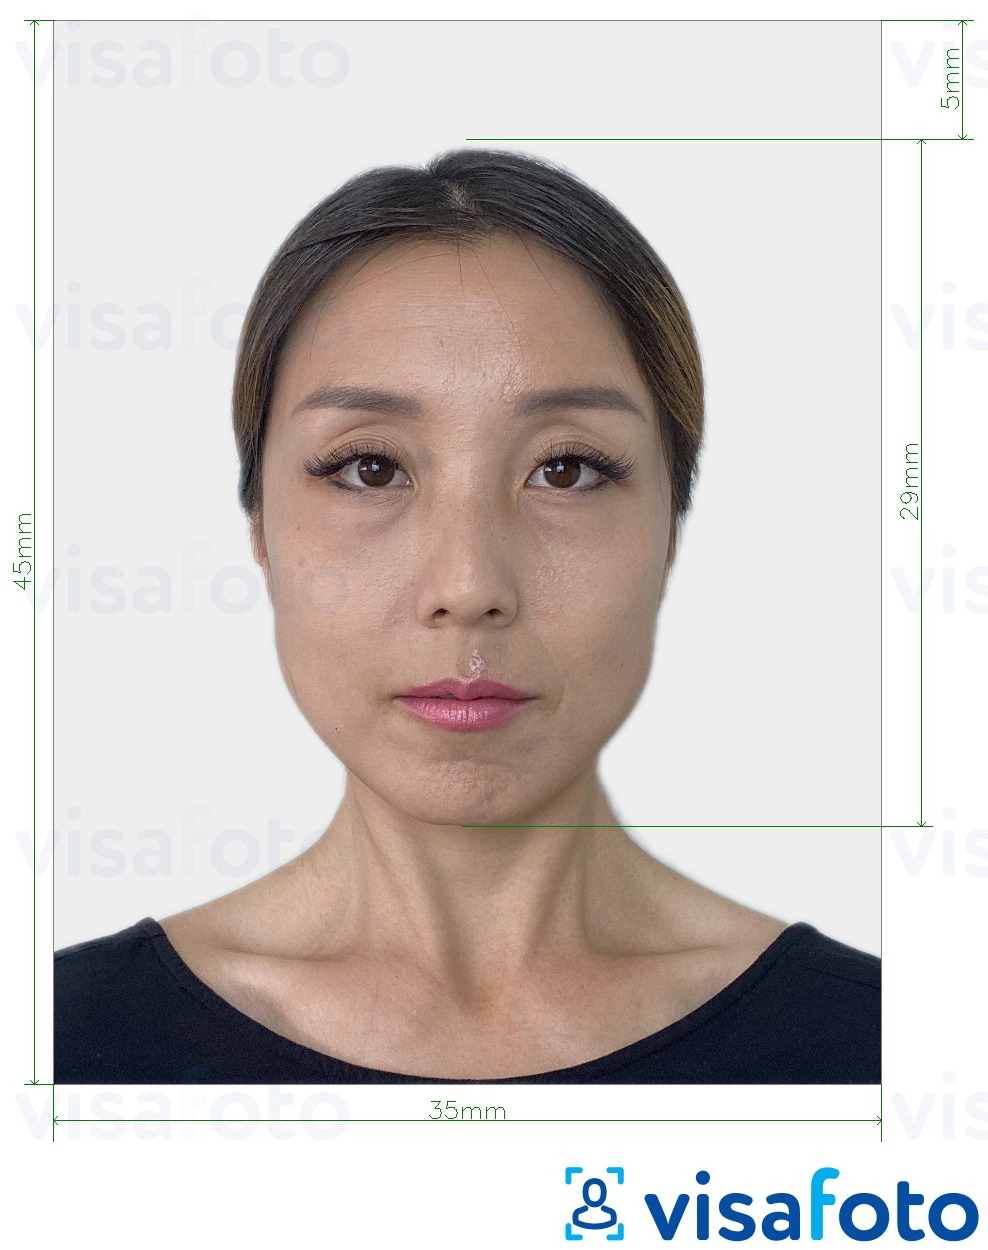
Japan visa photo requirements
Here are the parameters your photo must meet to be uploaded successfully:
- The picture must be taken within 6 months
- Scans are prohibited
- The file size must be up to 2 MB
- The file format can be JPG, PNG, GIF, BMP, HEIC
- The photo must be a rectangular one
- The background is a plain one
- There must be no texture in the picture
- The image must be a clear one
- The face is in the center of the photo
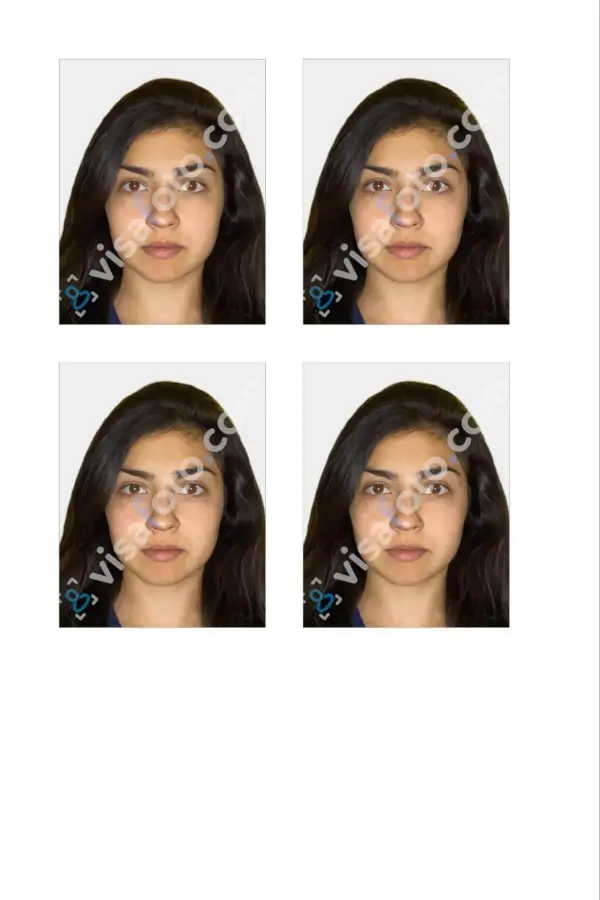
Here is an example of a Japanese E-visa photo:
Japan E-visa photo tool
Where is the best place to take a photo for a visa application? As Japanese visa photo requirements are pretty specific and differ from most passport-sized photographs, it is better to commit this job to specific online instruments. With Visafoto, you can take a picture for your visa application online anywhere on Earth!
Source

Result
Use our visa photo cropping tool for the quickest result. Simply upload your full-face picture taken in normal light.
It should look like this:

Visafoto will immediately modify the size and format, replace the background with plain white, and improve the image quality. The resulting picture will be 100% submissive to the established requirements.
You will get two types of files. A digital one is for electronic submission, and a template is for printing. Although you do not need to print a photo for a Japanese e-visa, you can use the template for other documents.

What to do if there’s a mistake in my application form?
Unfortunately, you cannot edit the application form once you have submitted it. So how to fix the form? Just withdraw it by "Request for Withdrawal".
How to pay a Japan electronic visa fee
The Japanese e-visa cost is 3,000 yen.
Unfortunately, online payment is available only in some countries. If it is unavailable in your country, you must pay by cash at a Japanese embassy or consulate (Japanese overseas establishment).
Remember that the Japanese electronic visa fee is nonrefundable, like all other visa fees.