December 21 2017, Author: Serge Mikeyev
Making and Correctly Submitting a Photo for Cambodia e-Visa Online Application
Instructions:
- First of all, make a Camdodia visa photo at visafoto.com.
- Then go to the evisa.gov.kh website.
- Press the Apply Now button at the end of the page.
- In the Personal Information section press the Chose File button under the Applicant's Photo.
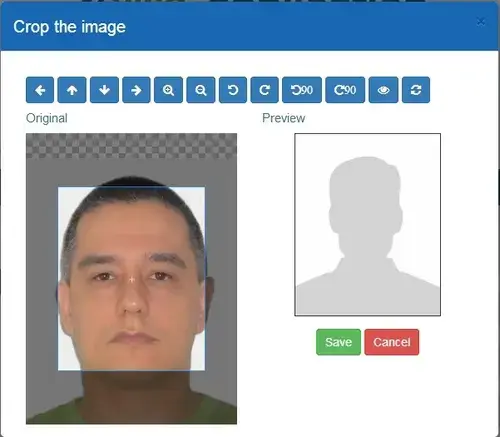
- After uploading your photo the "Crop the image" box comes up.
When you just uploaded your photo:
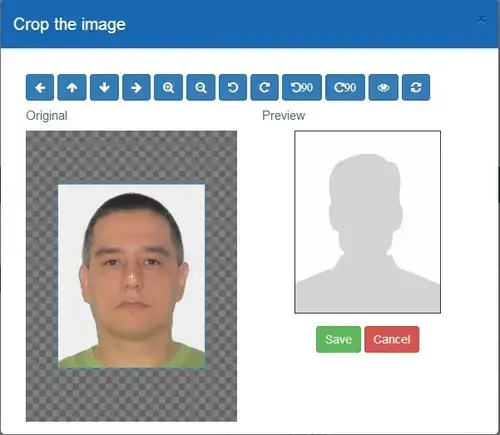
 This is how you need to align the borders of the image:
- You need to align the borders of the uploaded image in the "Crop the image" box, so the image ocupies exactly 100% of their edit area, i.e. the borders of their highlighted edit area should coincide with the borders of your photo.
- Press the Save button.
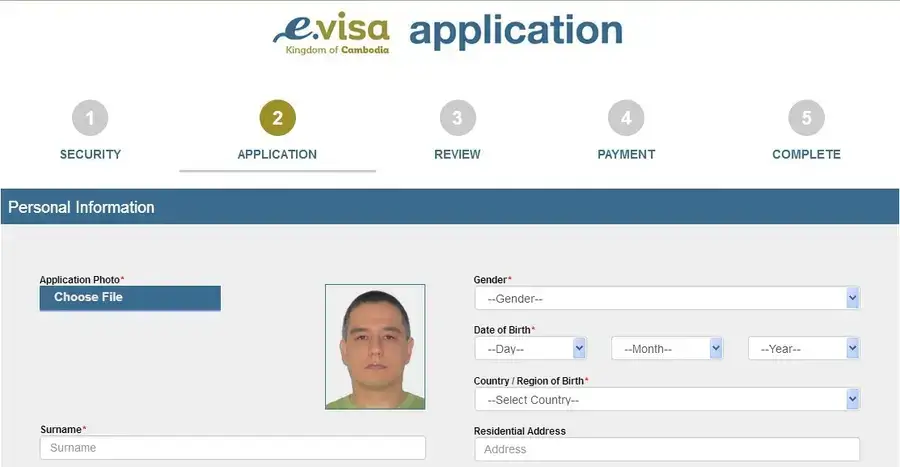
- You will see your photo next to the Choose File Button.
- Complete your application form and press the Next button at the end of the page.
- On the Preview page you will see Application#1 is OK!
- There will be a green tick under your photo.
- Press the Submit button.
- You are done with the photo.
This is how your screen should look after you have proprely uploaded the photo:


Possible problems
The main problem is to properly align the borders of the uploaded photo with the highlighted area
in the Crop the image box. Please follow the screenshots and description above.