DS-160 Form Instructions. How to Complete Your U.S. Visa Application
Filling out form DS-160 is an essential step to obtaining a nonimmigrant visa to the United States. The applicant will not be accepted for an interview without a completed questionnaire.
To complete the U.S. visa application correctly, you need to be aware of many details - from your passport number to the phone numbers of your previous employers.
Table of contents
- Step 1: pay the USA visa fee
- Step 2: Preparing the necessary data
- Step 3: Get an Application ID
- Step 4: Go on to filling out personal information
- DS-160 application tips
- The last one step: «Sign and Submit»
- Create a U.S. visa photo with the 7ID app for Android and iOS
Here are step-by-step instructions on how to complete the DS-160 form yourself!
Step 1: Pay the USA visa fee
Depending on your country of residence, the payment methods vary. Below is a list of how to pay the U.S. visa fee in selected countries:
- India: Pay at Axis Bank or Citibank branches, via NEFT (online banking), IMPS, or with a mobile payment app like UPI. A unique receipt number will be generated after payment.
- Mexico: Payment can be made at Scotiabank branches or via Banamex online banking. After payment, wait for the confirmation email before proceeding to book an appointment.
- Philippines: Pay at any branch of RCBC (Rizal Commercial Banking Corporation) or via online banking using the DragonPay platform.
- Kenya: Pay at any branch of the Postbank or via mobile money service M-Pesa. Payment reference numbers will be required to schedule an interview.
- Nigeria: Payment can be made at GTBank branches or via GTBank’s online banking and mobile app platforms. You must register on the CGI Federal website to generate a payment slip first.
You can find detailed instructions and download the visa fee receipt form on the official website of the U.S. Embassy in your country under the "Payment of Consular Fee" section.
After making the payment, it is crucial to keep the receipt. This document includes important details such as the date of payment and a 12-digit reference or transaction number. You will need this number to schedule your visa interview through the Consular Electronic Application Center (CEAC) or your local Embassy’s appointment system.
You must also bring the original receipt to your interview as proof of payment. Without it, your appointment may be delayed or canceled.
Step 2: Prepare the necessary documents and information
To accurately complete the DS-160 form for a U.S. non-immigrant visa, you’ll need to have specific documents and details ready. Gather the following before you begin:
- Valid passport: Must be valid for at least six months beyond your intended stay in the United States.
- National ID (if applicable): Useful for verifying personal information.
- Details of any previous U.S. visas: Include visa numbers and dates of issuance, if available.
- Educational background: Names, locations, and dates of schools, universities, and any professional training or courses completed.
- Military service history (if applicable): Include service dates, roles, and ranks.
- Personal and family information: Marital status, names and birthdates of spouse, children, and parents.
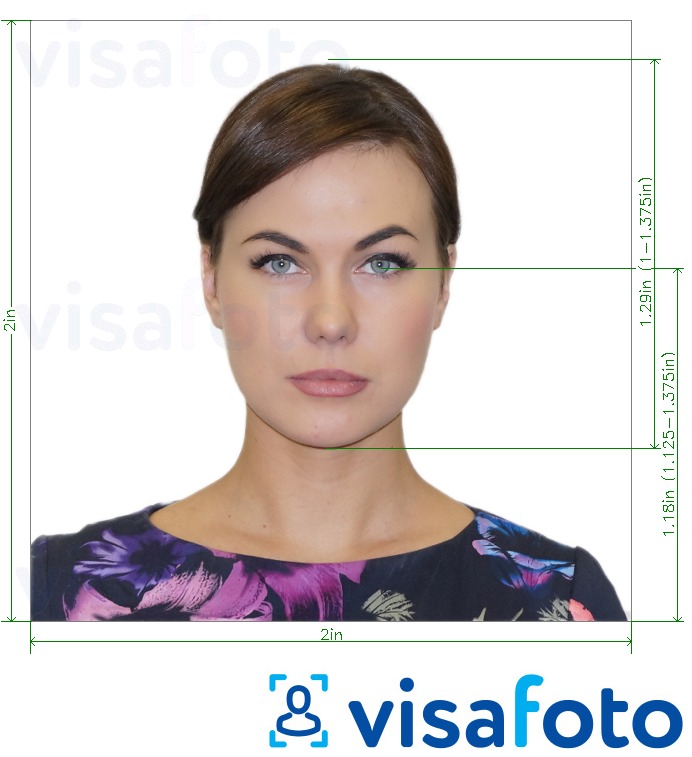
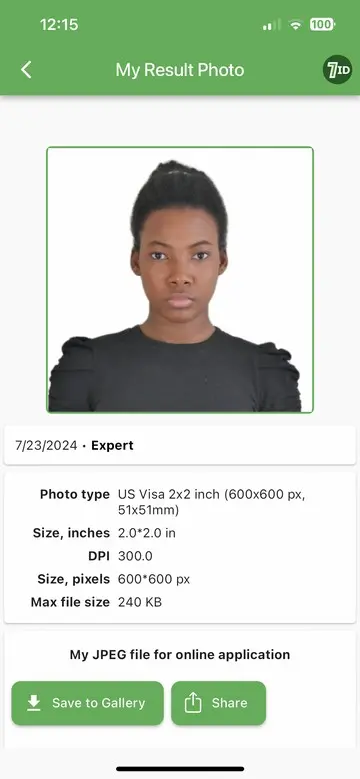
- Digital photo for the U.S. visa: The photo must meet strict U.S. Department of State requirements. Size should be 2x2 inches (5x5 cm) or 600x600 to 1200x1200 pixels in digital format.
To get a compliant U.S. visa photo instantly, simply upload a full-face portrait to Visafoto. The service will automatically adjust the background, size, format, and quality to meet DS-160 standards.
Before uploading, it's recommended to review the official U.S. visa photo requirements to ensure your photo meets all criteria.
Here is a DS-160 photo example:
Step 3: Get your DS-160 Application ID
You must submit Form DS-160 online via the official Consular Electronic Application Center (CEAC) at ceac.state.gov/ceac/. To begin, select the U.S. Embassy or Consulate where you plan to attend your visa interview. Then enter the CAPTCHA verification code and click on “Start an Application.”
After you start the application, you will receive an Application ID - a unique alphanumeric code. This ID will later become part of your Confirmation Number once you complete the form. You will also be prompted to answer a security question, which is essential for retrieving your application if you need to pause and return later.
Be sure to:
- Click on “Print Application ID” to save a physical or digital copy of your Application ID.
- Write down or securely store your answer to the security question.
If you are unable to complete the DS-160 form in one session or if your browser session expires, you can use the Application ID and security answer to resume your application from where you left off. The system automatically saves your progress for up to 30 days.
Step 4: Fill out your personal information in the DS-160 form
The DS-160 form must be completed online in English characters only. Be sure to use the exact spelling and transcription of names and other personal information as shown in your passport. Although the content of the form must be entered in English, you can change the interface language for guidance by selecting your preferred language in the top-right corner of the page.
Answer all questions truthfully. Attempting to hide or misrepresent information can lead to visa denial. Fields marked as "optional" are not mandatory, but all other fields must be completed accurately and completely.
DS-160 guidelines and tips
Important: The DS-160 form must be completed within 75 minutes of generating the Application ID. If you are inactive for more than 20 minutes, the session will time out, and unsaved information will be lost. Use the “Save” button often and download the form progress as a file (.dat) to continue later if needed.
Here are essential tips to help you fill out the DS-160 form correctly:
- Visa type: Choose the correct visa category before starting. For tourism or business, select B1/B2. See our guide to B1/B2 visas for details.
- Passport: Select "Regular" as the passport type. Your passport must be valid for at least 6 months beyond your planned stay in the U.S.
- Spelling: Enter surnames and other data exactly as shown in your passport, without modifications.
- U.S. address formatting: Follow American conventions when entering your U.S. address: house number first, then street, and apartment number at the end (e.g., 123 Main Street Apt. 4B).
- Social media section: You must list all social media platforms you've used in the past five years for communication, work, or personal use (e.g., Facebook, Instagram, LinkedIn, Twitter, etc.). Shared company accounts can be excluded. Failing to disclose active accounts may lead to suspicion and visa refusal.
- Purpose of travel: Ensure that your stated purpose of travel matches your selected visa type. Don’t skip fields like “intended travel date” or the address where you’ll stay in the U.S. - these are mandatory.
- Previous visas: Enter the exact visa number and date of issuance for your most recent U.S. visa, if applicable. If you've ever been denied a U.S. visa, indicate the refusal and briefly explain the reason.
- U.S. contact information:
- If visiting someone, list their full name and contact details.
- If traveling for business, include the company’s information.
- If you’re a tourist without contacts in the U.S., list your hotel’s address and phone number.
- Family information: You must provide your parents' full names, even if they are deceased. If you have close relatives (spouse, children, siblings, fiancé(e)) living in the U.S., this must be disclosed.
- Spouse's previous names: If your spouse has ever used another name (e.g., a maiden name), it must be included.
- Educational history: List all institutions attended, even if you didn’t complete the program or earn a degree.
- Photo compliance: Ensure your photo meets official requirements. Use a service like this checker to verify compliance before submission.
You can save your application and return to it within 30 days. To do so, you’ll need your Application ID and the answer to your security question.
Source

Result
Read more: DS-160 Photo Rejected: What to Do
The last one step: «Sign and Submit»
Once all sections of the DS-160 form have been completed, you’ll proceed to the final step: uploading your digital photo and submitting the form.
Attach your photo: Upload your 2x2 inch (600x600 to 1200x1200 pixels) digital U.S. visa photo directly to the form. The system will verify whether the photo meets the technical requirements. If the photo fails the check, you will be asked to bring a printed version to the interview instead.
Review your entries: Click the “Review” button to carefully go through all the information you’ve provided. This is your final opportunity to correct any mistakes or omissions. Once the form is submitted, it cannot be modified.
Sign and submit: After reviewing, you’ll be asked to enter your passport number and a CAPTCHA code shown on the screen. Then, sign the application electronically by clicking “Sign and Submit.” Submitting your DS-160 form finalizes your application and locks the data. You will not be able to make any changes afterward.
Print the confirmation page: Once submitted, a confirmation page with a barcode will appear on your screen. This confirmation page is essential - you must print it and bring it to your visa interview at the U.S. Embassy or Consulate.
Tip: It's a good idea to also save a digital copy (PDF) of the confirmation page and the full DS-160 form for your records.
You're done! You can now proceed to book your visa appointment using the confirmation number. Best of luck with your U.S. visa interview!
Create a U.S. visa photo with the 7ID app for Android and iOS
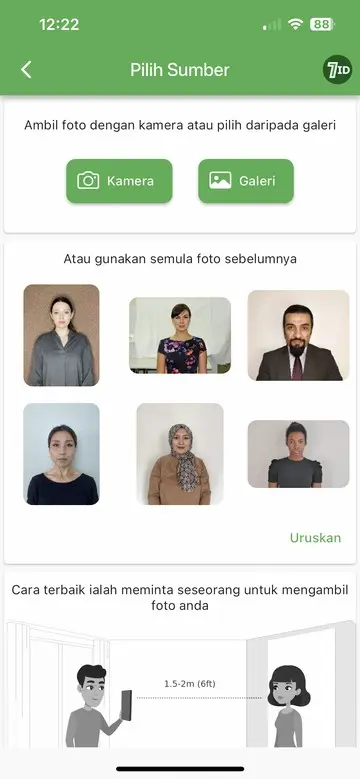
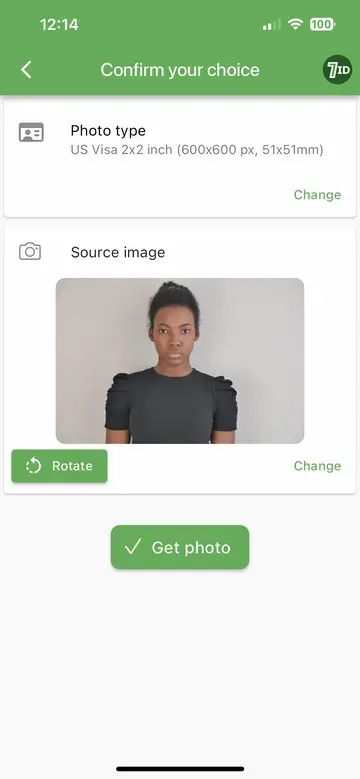
Need a compliant photo for your U.S. visa? The 7ID mobile app makes it fast and easy. Available on both iOS and Android, the app allows you to take or upload a portrait and instantly transform it into a valid U.S. visa photo.
Simply choose your document type and country, and 7ID will take care of the rest - including background removal, formatting, cropping, and alignment according to official U.S. visa photo requirements. The app generates both a high-quality digital version and a print-ready file that fits popular paper sizes like 4×6 inches, A4, A5, or B5.
Need help? Our customer support team is available 24/7 to answer any questions and make sure your photo is perfect.
Last update: November 2025