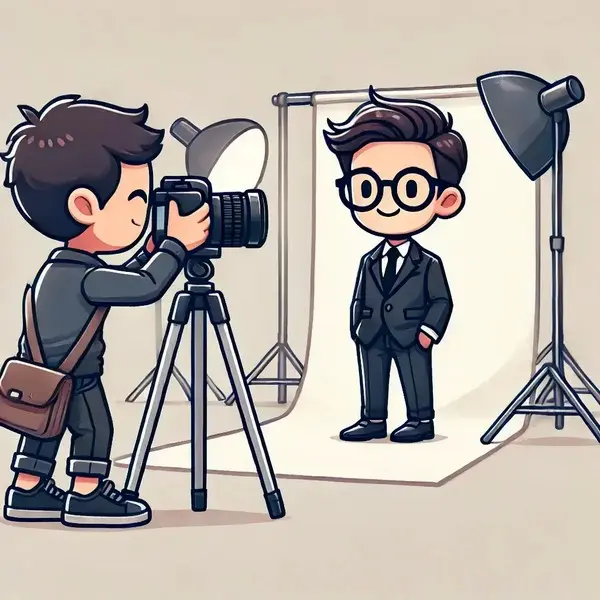
How to Take a Professional ID Photo: Studio Tips
Are you aiming to deliver top-notch document photos that keep your clients coming back?

In this article, you'll discover essential tips for capturing flawless and compliant ID photos that meet every official standard, ensuring your clients are always satisfied. Plus, you will learn how to simplify your studio operations and cut costs with 7ID app — ID picture maker, specifically designed for professionals in document photography services.
Table of contents
- General biometric photo standards for visas, passports, and other IDs
- Essential lightning to take a studio-quality visa or passport photo
- ID photo background selection and setup
- Required camera resolution for taking an ID photo
- Can you take an ID photo with a smartphone?
- ID photo posing tips
- Passport photo retouching
- How to resize the visa or ID photo? 7ID Pro Subscription for photo studios and visa agencies
- Printing a passport-type photo
General biometric photo standards for visas, passports, and other IDs
When creating photos for visas, passports, and other forms of identification, there are specific rules to meet international and national standards. These rules help make sure photos work well with facial recognition systems and are suitable for official documents.
Main requirements are as follows:
- Typically, passport and visa photos should measure 2 inches by 2 inches (51 mm by 51 mm) in the USA and 35x45 mm in most of European countries. The required passport photo size in Canada is 5x7 cm.
- For digital photos, aim for at least 600 pixels wide by 750 pixels tall.
- Photos should be clear with the right brightness and contrast. Avoid any that are too bright or too dark, ensuring natural skin tones.
- Use even lighting to prevent shadows on the face or background, and avoid red-eye. The subject should face the camera directly with a neutral expression, eyes open, and mouth closed. No head tilting or turning.
- The face should fill about 70-80% of the photo, usually around 1 inch in height from chin to top of the head.
- Use a plain, light-colored background without patterns or objects to make sure there's a clear contrast with the subject's face.
- If glasses are worn, make sure they don't cause glare or hide the eyes. Thin frames are preferable, and sunglasses are not allowed.
- Head coverings for religious or medical reasons are acceptable as long as they leave the whole face visible from chin to forehead.
Resize photos to 35 mm × 45 mm, 5 cm × 5 cm or any other format with the 7ID photo cropping tool for visa, passport, and ID.
Essential lightning to take a studio-quality visa or passport photo
Ensuring the right lighting setup in your studio can significantly enhance both the quality and compliance of ID photos. The aim is to achieve soft, diffused lighting that highlights your client's face evenly, avoiding any harsh shadows or bright spots.
Soft, diffused lighting
Use soft, even lighting to reduce strong shadows and highlights. This can be achieved by harnessing natural light or using diffusers with your studio lights.
Using natural light
A bright, overcast day is ideal, with clouds serving as a natural light diffuser offering gentle illumination.
Indoor tips: position clients near north- or south-facing windows to capture steady indirect light. Steer clear of direct sunlight, which could cause uneven lighting and harsh shadows.
Artificial lighting setup
Utilize two soft light sources positioned at eye level on either side of the camera, angled slightly towards your client's face, ensuring even lighting distribution. Avoid overhead lighting as it may cast unflattering shadows on the face.
You can find more passport photo lighting tips in this guideline.
ID photo background selection and setup
The background color and setup play a crucial role in achieving a compliant and professional ID photo.
Background colors and setup tips:
- White, pale grey and blue are the most commonly accepted backgrounds in passport photographs. Be aware that some countries may have specific requirements; for instance, red backgrounds are popular in certain Asian regions.
- Ensure the background is free from patterns, textures, or objects to keep the focus solely on the subject.
- Position your client at least 1-2 feet away from the background. This distance reduces shadow casting and adds a slight blur effect, enhancing focus on the subject.
- Use smooth surfaces such as walls, sheets, or professionally designed backdrops for photography. Make sure the background is wrinkle-free to keep the photo looking polished.
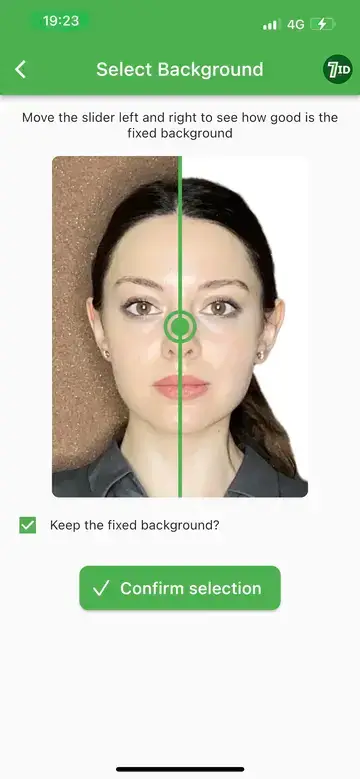
If you need to modify the background post-shooting, consider using visa photo cropping tools like the 7ID App. This app can help you easily switch backgrounds, ensuring they meet specific ID photo requirements across different countries.
Required camera resolution for taking an ID photo
A minimum resolution of 400 x 400 pixels is typically adequate for smaller ID formats.
Larger formats such as passport photos and similar documents should be taken at a resolution of at least 600 x 600 pixels with a print quality of 300 DPI (dots per inch). This ensures high clarity and detail.
Many cameras offer a standard resolution of 640 x 480 pixels, which can be sufficient for basic needs but might not meet specific standards demanded by some authorities. Opting for higher resolutions, such as 1200 x 1600 pixels, provides greater detail and allows for flexible cropping without losing quality.
When using digital cameras or smartphones, always choose the highest quality setting available. This maximizes the detail captured in your photo.
Save images in a JPEG format (.jpg) to maintain a balance between quality and manageable file size.
Can you take an ID photo with a smartphone?
Yes, you can absolutely use a smartphone, as long as you follow proper guidelines to ensure the photo meets the necessary standards for identification documents like passports and visas. Modern smartphones can rival professional cameras in terms of image quality, making them a viable option for capturing ID photos.
ID photo posing tips
As professionals, you know the importance of a perfect ID photo. Here are some posing tips you can share with your clients to ensure they look their best:
- Maintain proper distance. Position the camera about 1 to 1.5 meters away from the client. Ensure the top of their shoulders is visible within the frame to capture the right proportions.
- Avoid shadows on your client's face or behind them as this can lead to photo rejections. Adjust the lighting as necessary to ensure even illumination.
- Encourage a relaxed and neutral expression. Clients should avoid full smiles, which might distort facial features. Instead, suggest they keep their facial muscles relaxed with lips gently closed.
- Teach clients to subtly pull the corners of their lips and “smile” with their eyes for a pleasant appearance without breaking the neutral expression.
- Remind clients to maintain a straight and upright posture, with relaxed shoulders, to achieve a flattering silhouette in the photo.
- Advise lifting the head slightly to prevent the appearance of a “double neck,” enhancing the overall look of the photo.
Passport photo retouching
It's generally acceptable to make small edits to passport photos, as long as these tweaks don't drastically alter how the person looks or compromise the photo's authenticity. Here’s how you can approach retouching while keeping these standards in mind:
Feel free to adjust the brightness and contrast to ensure the photo is clear and well-lit. This helps prevent issues with the photo being too dark or overly bright. You can also tweak the color balance to make sure skin tones look natural. Just remember, any changes should keep the photo looking realistic and not misleading.
Avoid significant alterations to facial features like changing hairstyles, removing notable blemishes, or reshaping facial contours. The goal is to have the photo faithfully represent the person. While minor skin blemishes can be edited out, important features like scars or birthmarks should stay visible to ensure the photo remains a reliable identification tool.
You can adjust the background, as long as you stick to guidelines. Typically, passport photos need a simple, light-colored backdrop without any distracting patterns or shadows. If the original background isn't suitable, software passport, ID, and visa photo editing tools like 7ID App can help you change it to white or off-white.
How to resize the visa or ID photo? 7ID Pro Subscription for photo studios and visa agencies


Looking to streamline your ID and visa photo services? Meet the 7ID app for making passport photos, designed specifically for photo studios and visa agencies. With this ID, passport, and visa photo cropper, you can capture, edit and resize photos directly from your smartphone — no need for expensive cameras, computers, or editing software.
Whether it’s for a visa, passport, ID, or any other document, 7ID ensures compliance with official biometric standards. For full access, use a 7ID Pro Subscription — unlimited ID, visa, and passport photos for a fixed monthly fee.
Here’s how 7ID App works:
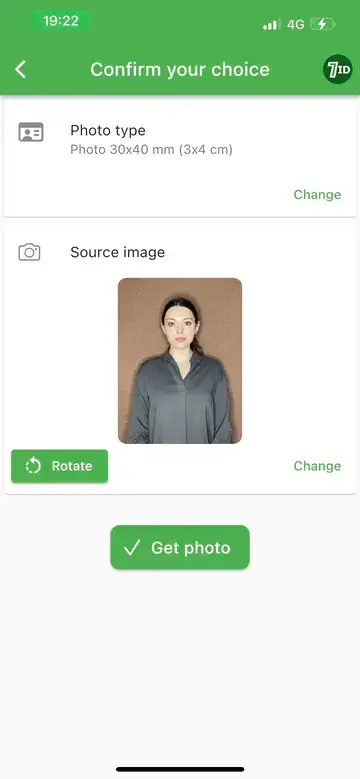
- Upload your client’s photo to the app, choose the document type and country, and let the app handle the adjustments automatically.
- Key features:
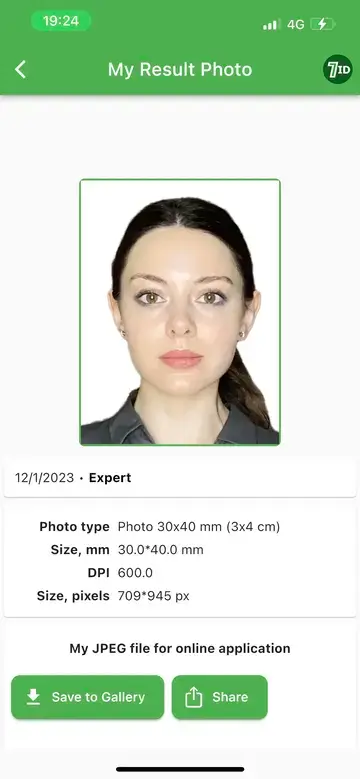
- 7ID resizes images for visa applications, or any other document applications to match specific requirements: dimensions, file size, head proportions, and eye alignment.
- Changes backgrounds to a plain white finish.
- Verifies compliance with the latest regulations.
Why choose the 7ID Pro Subscription?
- Unlimited photos: Create as many ID, visa, and passport photos as you need for one fixed monthly fee.
- Minimal setup: All you need is professional lighting, a backdrop, and a smartphone — no fancy equipment required.
- Beginner-friendly: No advanced photography skills or complicated software needed.
- Digital format readiness: Every photo meets online submission standards for size, resolution, and layout.
- The app’s database is regularly updated, so you’ll always be working with the most current requirements for over 900+ formats across 168 countries.
For photo studios, 7ID Pro Subscription is the ultimate tool to save time, cut costs, and deliver perfect results every time. Moreover, with the 7ID photo cropping tool, visa, passport, and ID photos are 99.7% guaranteed to be accepted by the authorities.
Printing a passport-type photo
With 7ID photo print app, your studio can efficiently produce both digital and print-ready ID photos:
- Easily adjust pixel dimensions and file sizes for online submissions using digital editing features.
- Generate templates ready for print in any paper format, allowing for multiple photos per page. This is highly useful for processing physical applications that require printed copies.
Install the 7ID passport photo booth app on your iPhone or Android and become the best place to take passport photos for your customers!