Guide to Flawless Passport Photo Lighting
Achieving the perfect lighting for a passport photo is critical in creating a photo that meets government standards and shows you at your best.
In this guide, we highlight the best practices for getting the right lighting in your passport photo to ensure that you meet the strict criteria without sacrificing the quality of your image.
Table of contents
- Standard Passport Photo Requirements
- Characteristics of Ideal Passport Photo Lighting
- Setting Up Your Photo Space
- Lighting Techniques for Passport Photos
- Natural Light Photography Tips
- Artificial Light Photography Tips
- Edit Your Passport Photo Online!
- Tips for a Flattering Passport Photo
Standard Passport Photo Requirements
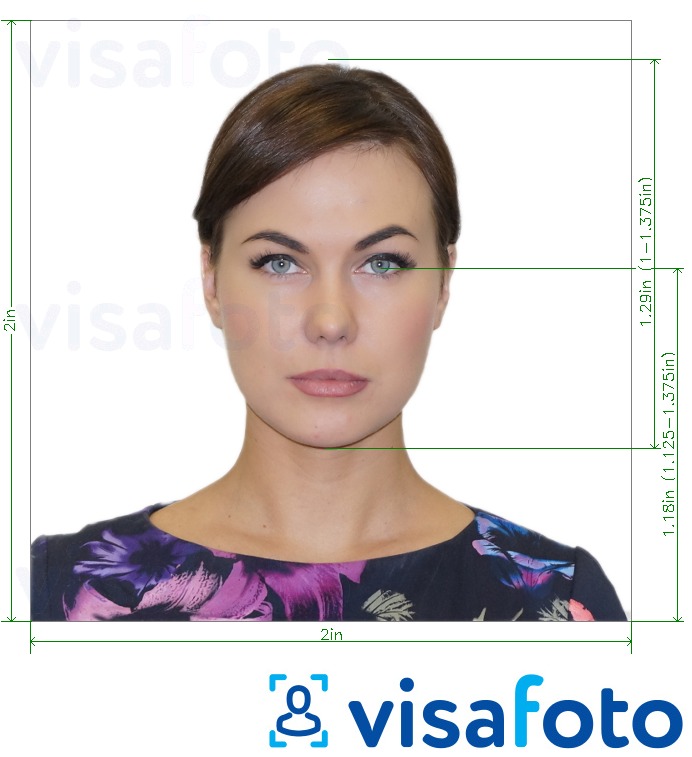
Government agencies worldwide require passport photos to have a neutral background, typically white or off-white, and that the subject's face be clearly visible and in focus.
The photo must show your full head, from the top of your hair to the bottom of your chin, with your eyes open and clearly visible. This means no shadows across your face or on the background, no red-eye, and no glare on eyeglasses if you wear them.
Correct sizing is also crucial, usually 51×51 mm (2×2 inches) in the United States, but this can vary by country. These specifications ensure uniformity and recognizability, which are crucial in a document as important as a passport.
Glasses are not permitted unless they are required for medical reasons. If you must wear them, ensure they do not cover your eyes or cause reflections.
Hats are prohibited unless they are part of your religious attire and should not cover your face or eyes. Also, ensure the photo is recent, no more than six months old, to ensure it accurately represents you.
Characteristics of Ideal Passport Photo Lighting
The goal is soft, diffused lighting that evenly illuminates your face without harsh shadows or highlights. To sum up, the main passport photo lighting requirements are as follows:
- The photo needs to be sharp and clear.
- It should have natural colors.
- Your image should stand out from the background.
- No red-eye.
- And no shadows on your face or behind you.
Setting Up Your Photo Space
Creating the ideal setting is easy. First, find a room with a suitable light background for a passport photo — flat, light-colored walls are perfect. Ensure you have enough room to stand a few feet from the background to avoid shadows. You can skip this step if you use special passport photo background editors like Visafoto or 7ID.
The room should be well-lit but not with harsh, direct lighting that can create deep shadows or overexposed areas. Setting up near a large window can provide excellent natural light, but avoid direct sunlight. If outside or window light isn't an option, choose a room with plenty of ambient light.
Clear the area of clutter and distractions to keep the focus on you, and follow the clean background requirement.
The camera or smartphone should be placed on a stable surface or tripod at eye level — about 4 feet (1.22 m) away — to ensure the photo captures the correct head and shoulder proportions for passport standards.
Lighting Techniques for Passport Photos
To learn how to get lighting right for a passport photo, follow these simple instructions:
- Find a well-lit place by the sun or lights whether indoors or outdoors. Avoid areas where the light creates big shadows or is too inconsistent.
- Place your light source, such as a lamp or an open window, directly in front of you. This ensures that your face is evenly lit, which reduces shadows.
- Having the light behind you is not recommended because it casts shadows on your face. Ensure the light comes at you from the front or evenly from all sides.
- Try softening it if you're dealing with a bright light that casts harsh shadows. You can do this by putting something like a lampshade over it or hanging a thin cloth in front of it.
- Don't wear hats, scarves, or thick glasses that shade your face. It may be better to take them off for the photo.
Natural Light Photography Tips
Natural light is often considered the best lighting for a passport photo. It can produce beautiful, soft, and evenly lit images, so many photographers prefer it. Let's review a few tips on how to use natural light for a passport photo:
- Aim for a bright but overcast day when the clouds act as a natural diffuser, eliminating harsh shadows and bright spots to make the most of natural light.
- If you're indoors, position yourself near a window where daylight is plentiful but not direct. North- or south-facing windows are ideal because they provide consistent, indirect light throughout the day.
- Avoid direct sunlight, leading to passport photo uneven lighting, overexposure, harsh shadows, and squinting. If you're using a window, make sure the light hits the front of your face.
- You can soften the light by hanging a thin, white curtain over the window. The curtain will act as a diffuser and create a flattering, even light.
Remember, the goal is to achieve balanced lighting across your face without noticeable shadows, especially under the eyes, nose, or chin.
Artificial Light Photography Tips
When natural light isn't an option, or you want more control over your lighting setup, artificial lighting comes into play. Here are a few tips on how to light passport photos perfectly with artificial source:
- Your light source should be directly in front of you. If it's coming from the side, like a window to your left or right, try to soften it with a curtain.
- If your room doesn't get enough natural light, place two lamps, one on each side of you, facing your face. Table lamps work if they're bright enough.
- Say no to ceiling lights, as they can cast shadows on your face, which looks bad.
- It's also important to consider your lighting's color temperature. To avoid unnatural color casts on your skin, aim for lighting close to daylight (between 5000K and 6500K). LED lights are a great choice, as many models can be adjusted for color temperature.
- Consider using a white balance card. This will help ensure that the colors in your photo look real. You can buy one or just print out a sheet of white paper.
- Finally, remember to adjust your camera or smartphone settings to match your lighting setup. This may involve adjusting the exposure or white balance to ensure that the colors and lighting in your photo are as natural and lifelike as possible. Try a few different setups by taking a few practice shots. Aim for an even and soft light with no harsh shadows.
Edit Your Passport Photo Lighting and Format Online!
Check out Visafoto.com when you need an ideal ID, passport, or visa photo! This service is easy to use and has a 99.7% success rate.
All you have to do is grab your smartphone or camera, take a picture of yourself in front of a blank wall, and upload it to the site. Visafoto will adjust your picture to meet any required specifications, such as size and background color, to ensure your face is well-placed for your passport.
Visafoto also runs an automatic photo enhancement process. Within about 20–60 seconds, the system can improve lighting to create studio-like illumination, enhance resolution and overall image quality (even for scanned photos), and fix framing issues by extending clothing to reach the edges of the final image if needed.
You will receive two versions of your photo—a digital version for online use and a printable template. If you're unhappy with the result, you'll receive a full refund.
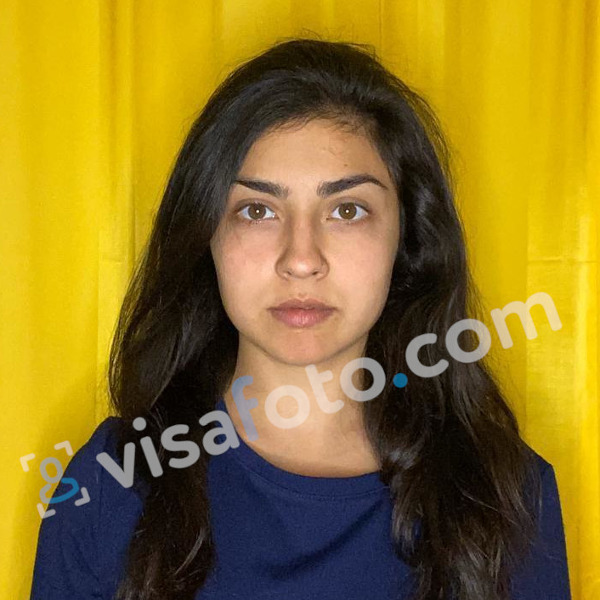
Source

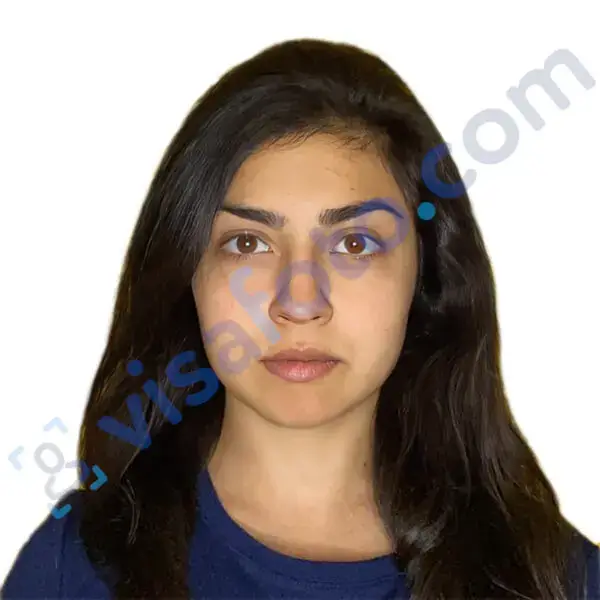
Result
Use a selfie taken under daylight, like this one:
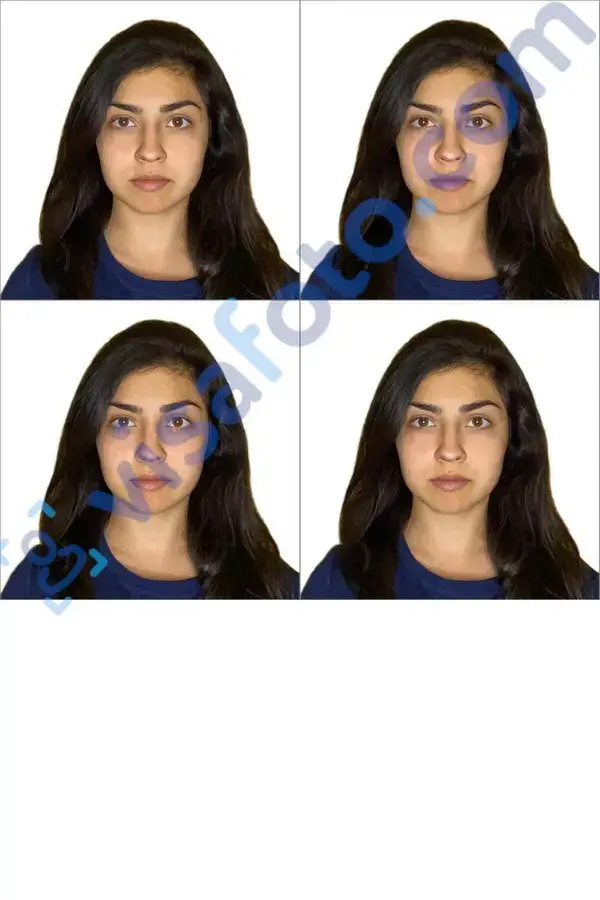
As the result, you get a photo for online submission an file with 4 photos for printing:
Tips for a Flattering Passport Photo
How to take a photo that looks professional:
- Try taking a photo near a window with natural light. If there is too much sunlight, you can use a sheer curtain to soften the light, otherwise, it may make the passport photo too light. Alternatively, you can place two lights at eye level on either side of the camera for even illumination.
- Stand about 1–2 meters from the camera for a better photo. You can use a tripod for stability. Ensure the camera is at the same level as the subject's eyes for a clearer image.Make sure the face is in focus.
- Stand up straight with relaxed shoulders and look at the camera to see your entire face. Maintain a neutral expression with a closed mouth and open eyes.
- It is recommended that you wear something simple and different from the background color to stand out in a photo. Avoid hats and sunglasses.
- When using Visafoto.com, the tool automatically sets the background to white (or any color, depending on your chosen document). However, for best results, it is best to start with a solid and neutral background when using basic editing tools.
By following these tips and using specialized services such as Visafoto.com, you can ensure that your passport photo looks professional, meets all required standards, and is flattering.
Last Update: March 2026