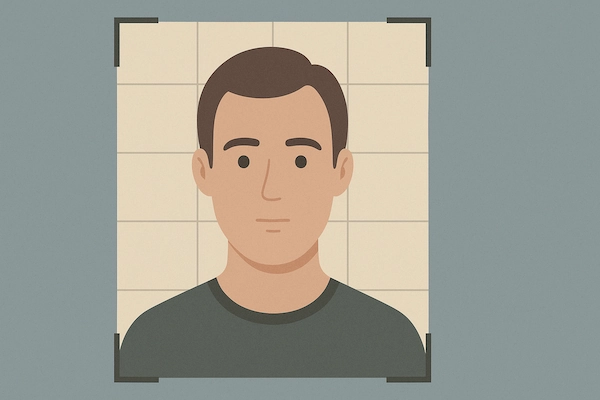
Passport photo quality: How to fix resolution, lighting, shadows, and other biometric photo problems
Passport and visa applications require photos that meet strict biometric standards. These rules are based on guidelines developed by the International Civil Aviation Organization, which define how a face must appear in official identity photographs. The goal is to ensure that biometric systems can reliably identify a person using the image.
Many applications are delayed because the submitted image fails basic quality checks. Common problems include low resolution, shadows on the face, poor lighting, and blurred images. This is why we recommend you to check and improve your passport photo quality before submitting your documents.
Table of contents
- Visafoto: №1 Online passport photo editor and quality enhancer
- Resolution requirements for biometric photos
- Image clarity and blur problems
- Lighting requirements for passport photos
- Background and shadow issues
- Tips for taking a high-quality passport photo on your own
Visafoto: №1 Online passport photo editor and quality enhancer
Visafoto is an online service that allows users to quickly create professional-quality photos for passports, visas, ID cards, and other official documents. It works for digital submissions as well as printable formats and supports the requirements of most countries, including exact sizes, backgrounds, and biometric standards.
Using Visafoto is fast and simple. Just follow these steps:
- Take a selfie – make sure your face is fully visible, with a neutral expression.
- Upload the photo to Visafoto and select the country and document type.
- Receive a compliant photo: the system automatically formats the size, adjusts background, and checks biometric standards.
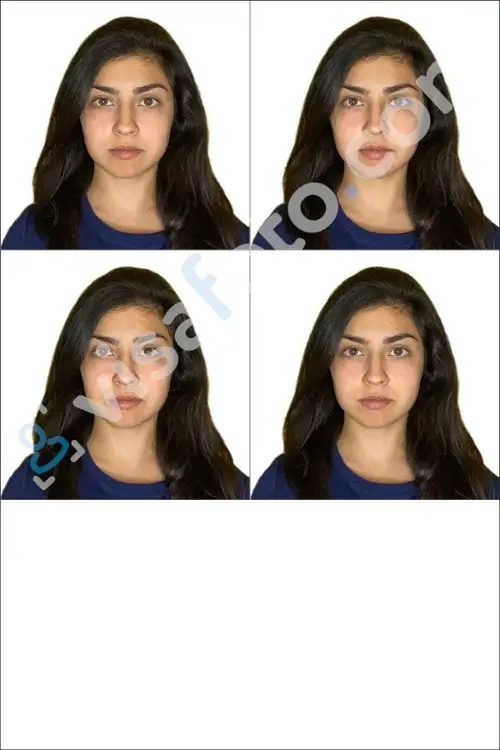
Source

Result
In addition to preparing compliant photos, Visafoto automatically improves photo quality for all orders. Within about 20–60 seconds, the system performs additional enhancements, including:
- Studio-quality illumination. Visafoto adjusts the lighting so the photo looks professionally lit even if taken as a selfie
- Resolution and image quality improvement. The tool enhances clarity and detail, even for scanned images
- Framing correction. Visafoto extends clothing or edges to fill the frame when the original photo was cropped too tightly
Example of a photo you can upload:
After processing, users can download both the standard processed photo and the enhanced version, suitable for printing or online submission. If the uploaded photo already meets quality standards, no changes are applied.
24/7 technical support is available to answer questions or check your photo. We provide a guarantee to all orders: if your photo is not accepted by the authorities, Visafoto refunds 100% of the payment.
Resolution requirements for biometric photos
Biometric photos must be sharp and detailed so that facial features are clearly visible. Images that are heavily compressed or taken with low-quality cameras may not meet the minimum technical standards.
One of the most common issues is passport photo resolution being too low, which often happens when people upload screenshots or cropped images from social media.
Standard passport photo DPI and printing requirements
According to ICAO Doc 9303, printed passport photos must have a minimum of 600 DPI, while digital files should range between 300–600 DPI with resolutions starting at 492 × 492 pixels to capture facial features clearly.
Images must use 24-bit color (sRGB), avoid heavy JPEG compression (quality >90%), and remain under 500 KB to prevent artifacts that can obscure biometric details such as iris texture. Low-resolution sources, like social media crops, almost always fail, as images below 400 pixels lack the edge definition required for automated checks.
Country-specific passport photo resolution requirements
| Country/Region | Resolution (Pixels) | DPI | Dimensions | Notes |
|---|---|---|---|---|
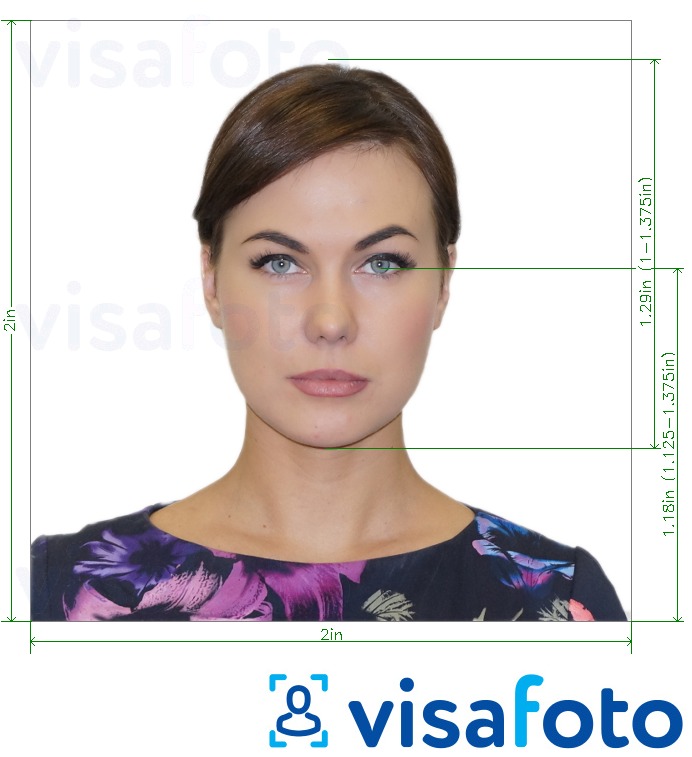
| US | 600 × 600 min to 1200 × 1200 | 300 | 2 × 2 in (51 × 51 mm) | Digital <240 KB JPEG; head 1–1.375 in |
| EU/Schengen | 600 × 800 min | 300–600 | 35 × 45 mm | Head 32–36 mm; white/cream background |
| India | 492 × 492 min (digital) | 300 | 2 × 2 in or 35 × 35 mm | PASSPORT Seva portal; <100 KB JPEG |
| Canada | 600 × 750 min | 300 | 50 × 70 mm | Head 31–36 mm height |
| UK | 600 × 700 min | 300–600 | 35 × 45 mm | Head 29–34 mm; <10 MB |
| Australia | 900 × 1200 min | 300 | 45 × 35 mm (landscape) | Head-centered; <500 KB |
Solution: If the image lacks detail, applicants may need to apply Visafoto for a passport photo resolution increase so your picture meets official technical requirements.
Image clarity and blur problems
High image clarity is essential for biometric photos, as facial recognition systems rely on sharp details to identify key features such as the eyes, nose, mouth, and facial contours.
According to ICAO Doc 9303, biometric photos must have sharp focus across the entire face with clear contrast, with at least 50% difference between skin tones and the background. Both sides of the face should be evenly visible, free from shadows or reflections.
Key requirements include:
- Eyes fully open and unobstructed
- Pupils and irises clearly defined
- No red-eye, squinting, or glare
- The face occupying 70–80% of image height from chin to forehead
Tips to avoid blur
- Use a stable tripod or flat surface to reduce camera shake
- Ensure the camera focuses on the eyes or center of the face
- Avoid low-light or night mode settings that increase digital noise
Solution: If your image lacks the sharpness, you can use Visafoto to convert a passport size photo blur to clear so the facial details become visible again.

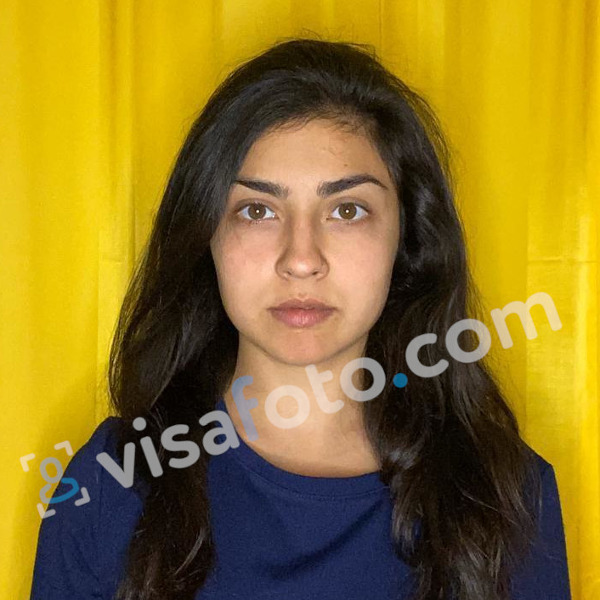
Before: A low-resolution scan, cropped too closely.

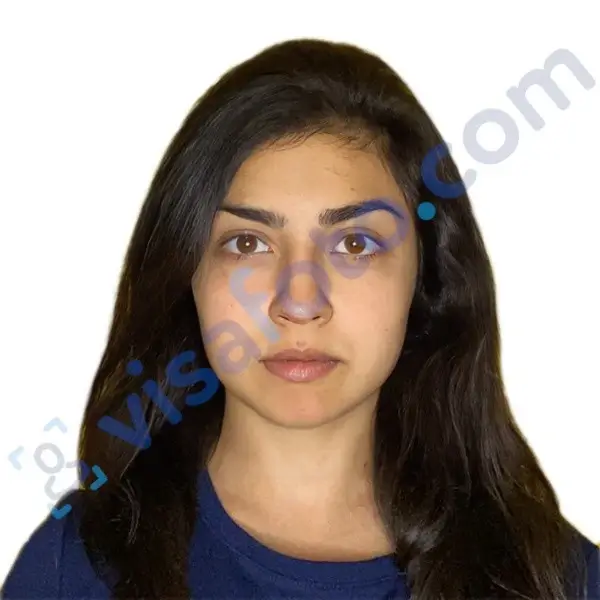
After: Clarity improved, and shoulders extended to meet official standards. Note: the result is a 2x2 inch US visa or passport photo.
Lighting requirements for passport photos
Biometric photos require even, frontal illumination with no shadows on the face, neck, or background.
Overexposed areas, such as shiny foreheads or reflections on glasses, create hot spots, while underexposure can darken one side of the face, obscuring contours. Light should be directed from angles up to 45°, rather than directly overhead as in many selfies. The color temperature should stay near 5500K (daylight/neutral white) to avoid warm bulbs that yellow the skin or cool LEDs that add a blue tint.
Common lighting issues
- Shadows: Side lamps or uneven lighting can create dark areas on the nose or chin. For example, a left cheek 20% darker than the right may fail ICAO evenness checks.
- Glare and hotspots: Flash reflections can whiten eyes or glasses, while indoor fluorescents can unevenly highlight brows.
- Low-light noise: Dim environments force cameras to boost ISO, introducing grain and blurring edges. Phone auto-boost often oversaturates reds, further distorting the image.
Solution: Visafoto’s editor automatically adjusts exposure and histograms, equalizing lighting without introducing sharpening artifacts.
Background and shadow issues
Most countries require a plain light background without visible shadows. Even when a wall appears white, lighting conditions may create shadows behind the head or shoulders.
ICAO Doc 9303 specifies a uniform, non-reflective background (RGB 240-255) with no shadows, textures, or gradients extending from the subject's head, neck, or shoulders; it must fill 10-20% of total image luminance to enhance face contrast. Shadows darker than 20% relative to the face trigger rejections, as they mimic objects or distort biometric geometry. You should avoid patterns, furniture outlines, or wall seams in your picture.
Solution: Visafoto functions as a passport size photo shadow remover and background changer to produce a clean and compliant backdrop.
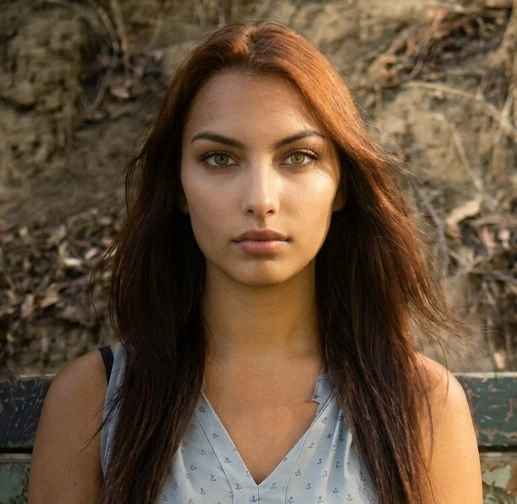
Before: Direct sunlight creating harsh shadows, with an outdoor background.
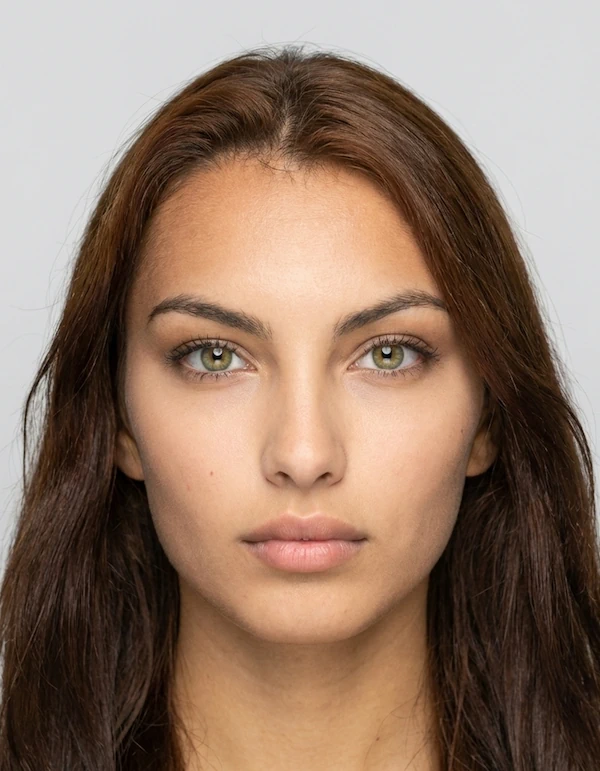
After: Shadows removed, lighting balanced, and background replaced with plain light grey. Note: the result is a 35x45 Canada visa photo or EU visa or passport photo.
Tips for taking a high-quality passport photo on your own
- Ensure even frontal lighting. Avoid shadows on the face, neck, or background. Natural daylight or diffused lights at 45° angles help create balanced illumination.
- Keep your face fully visible. Look straight at the camera with eyes open, mouth closed, and a neutral expression. Avoid hair or accessories covering your face.
- Check focus and clarity. Ensure the camera is stable to avoid motion blur. High-resolution cameras or smartphones in good light usually work best.
- Use the correct camera settings. ISO around 100, f/5.6, and neutral white balance (~5500K) help prevent noise and color distortions.
- Capture at sufficient resolution. For digital photos, aim for 600 × 600 pixels or higher at 300 DPI to preserve facial detail. Avoid screenshots or heavily cropped images.
- Avoid glare and hotspots. Remove glasses if they reflect light, and avoid shiny makeup or jewelry that can create reflections.
- Enhance if needed. Visafoto can automatically improve lighting, resolution, and framing for compliant, studio-quality results.