How to Convert a Selfie To A Passport Photo
Snapping a selfie is often quicker than booking a studio shoot — you control the angle, light, and final look. But when it comes to official papers like a passport, the rules are far less forgiving. A photo meant for travel documents must follow strict biometric standards, and only a portion of everyday selfies can be adapted to fit them. So the real question is: can a regular phone selfie be turned into an acceptable passport photo?
Table of contents
- Understanding passport photo requirements
- Selecting a suitable selfie
- Online ID photo maker
- Common mistakes to avoid
Below we break down how to turn a selfie into a compliant passport photo and what to watch out for along the way.
Understanding passport photo requirements
Size and dimension specifications
Passport photo dimensions are not universal — each country sets its own standard. The image must be formatted to the correct physical size and the digital version must match the required pixel resolution. Below are some of the most common formats used globally:
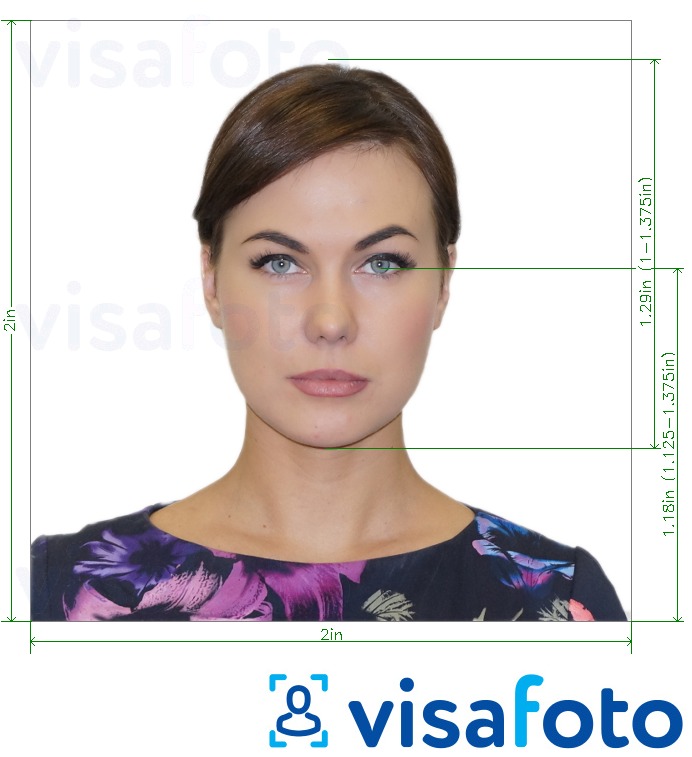
- 2×2 inches — standard for the USA passport photo and many American visa categories;
- 35×45 mm — classic ICAO-compliant format used in most European and Asian countries, including the UK, EU states, and Schengen visa submissions;
- 4×6 cm — a widespread passport size in several Middle Eastern and North African countries, especially for national ID and residence documents;
- 5×7 cm — typical for Canada passport photos and some immigration-related applications.
For digital submissions, authorities often specify pixel dimensions (e.g., 600×600 px for the US or 827×1063 px for many EU portals) along with file requirements such as JPEG format, minimum DPI (usually 300), and maximum file size. When converting a selfie, make sure both the print size and pixel resolution align with your target country's rules — a correctly sized image reduces the chance of rejection during application processing.
Background color and lighting
Most countries require a solid, light background, usually white or off-white, with no objects, furniture, or shadows visible behind the subject. Some regions allow light gray or cream backgrounds, but patterns, gradients, and textured walls are never acceptable for biometric documents.
Good lighting plays a major role when adapting a selfie. Natural daylight from the front or slightly above is ideal — it prevents harsh shadows under the eyes, nose, or chin, and keeps skin tone accurate. Flash from below or overhead lamps often creates sharp contrast, shiny skin patches, or uneven tone. A passport photo should show the face clearly without dark areas or blown-out highlights.
If the selfie was taken against a busy background, specialized passport photo tools can remove and replace it with a uniform color. However, software cannot always correct poor lighting. Deep shadows, backlight, or color casts (for example, warm yellow indoor light or neon reflections) may lead to rejection even after editing. It’s best to start with a well-lit photo taken in front of a plain wall — this makes processing faster and ensures better results.
Facial expression and positioning
Biometric systems rely heavily on facial recognition, so posing matters as much as technical formatting. Most passport authorities require a neutral expression: no smiling with teeth, no squinting, no raised eyebrows, and no exaggerated poses. The mouth should remain closed, and both eyes must be clearly visible and fully open. Think of it as a calm, natural look — neither tense nor overly posed.
Head position is equally strict. The face should be centered and facing the camera directly, not turned, tilted, or angled. Avoid taking a selfie from above or below, as perspective distortion may make the forehead, nose, or jaw appear disproportionate. Keep the camera at eye level — this helps maintain proper proportions and meets biometric template standards.
- Keep your head straight — no leaning or tilting.
- Look directly into the lens, not at the screen reflection.
- Ensure both ears are visible if the issuing authority requires it.
- Maintain even shoulder alignment — slouching can affect framing.
Using a tripod, phone stand, or a selfie stick held at eye height often works better than hand-held arm’s-length selfies, which tend to distort the face and cause unwanted camera angles. Many applicants place their phone against a wall or a stack of books for a stable, forward-facing shot.
Staying relaxed is essential. A stiff pose can look unnatural and may be flagged during biometric review. Aim for a calm, balanced expression, and your selfie has a much better chance of being successfully converted into a passport-ready image.
Dress code recommendations
Clothing and accessories may seem like minor details, but they are often cited as reasons for photo rejection. Head coverings, hats, caps, and fashion accessories are not allowed unless worn for medical or religious purposes. Even then, the face must remain fully visible from the bottom of the chin to the top of the forehead, with no shadows. Large earrings and heavy jewelry can also create glare or cover parts of the face, so it’s better to remove them before taking a photo.
Choose attire that looks clean and neutral. Authorities recommend plain, solid-colored clothing — ideally something darker than the background to maintain contrast. Light tops on a white background may blend in, making the neck and shoulders difficult to distinguish. Patterns, logos, stripes, or highly reflective fabrics should be avoided, as they can draw attention away from the face or interfere with automated biometric systems.
- No sunglasses or tinted glasses (transparent prescription lenses are usually allowed if they don’t reflect light).
- No uniforms or clothing resembling government or military attire.
- If religious clothing is worn, ensure the face remains uncovered and well-lit.
- Keep hair tidy — avoid styles that cover the eyes or cast shadows.
Selecting an outfit similar to something you would wear for an interview or official meeting works well. A simple shirt or blouse with a contrasting color is often sufficient. Good wardrobe choice, combined with proper background, lighting, and posture, can make a selfie look professional and passport-ready.
Selecting a suitable selfie
Before you start editing, the most important step is choosing the right source photo. A usable selfie should reflect your current appearance, without beauty filters, smoothing effects, artificial sharpening, or color alterations. What looks great for social media often fails biometric checks — skin texture, natural shadows, and real proportions must remain intact for the photo to be accepted.
Pick a selfie where your whole face is clearly visible and evenly lit. The camera should be positioned at eye level, at a moderate distance, so tones and proportions look natural. Avoid images taken too close to the lens — wide-angle distortion can enlarge the nose and shrink other features, making the result look disproportionate once cropped.
- Use a recent photo (typically taken within the last 6 months).
- Avoid filters, beautification tools, or face-reshaping effects.
- Check that hair, eyebrows, and jawline are unobstructed.
- Make sure the image has enough resolution for cropping — pixelated photos rarely pass.
A high-quality selfie taken in front of a plain background, with proper lighting and a neutral expression, will process smoothly in a passport photo generator. Starting with the right shot saves time and dramatically increases the chances of approval when you submit your application.
Online ID photo maker
Need a straightforward way to turn your selfie into a compliant passport photo? Visafoto is an online ID photo editor designed exactly for that task. Upload a suitable selfie, and the service will convert it into a passport-style image that follows the official sizing and composition rules for the document you choose.
After upload, Visafoto automatically crops the picture to the correct head height, adjusts the frame to the required size, and replaces the background with a uniform light color. It also fine-tunes brightness, contrast, and sharpness so that the face is clearly visible and ready for biometric checks. You can create photos not only for passports, but also for visas, residence permits, and other IDs using the same selfie as a source.
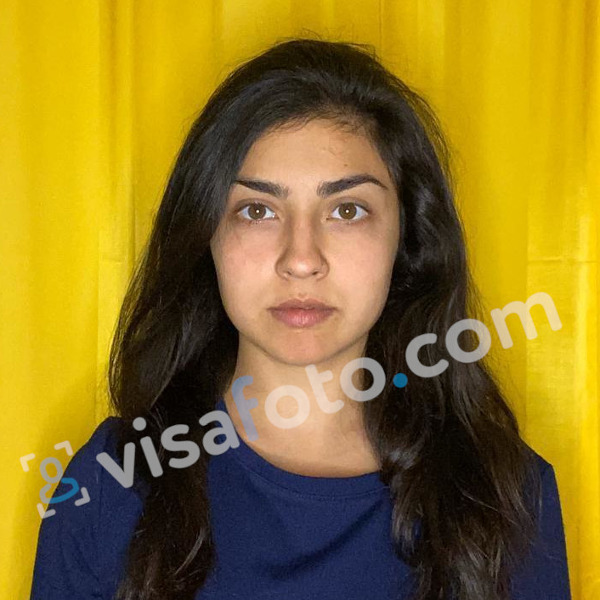
Source

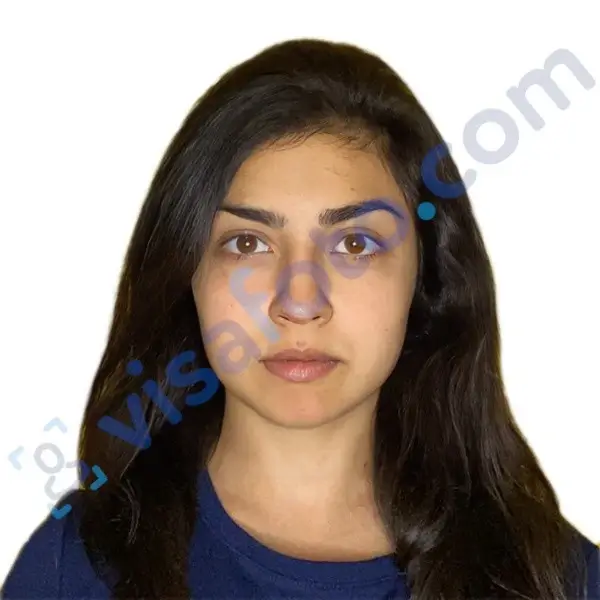
Result
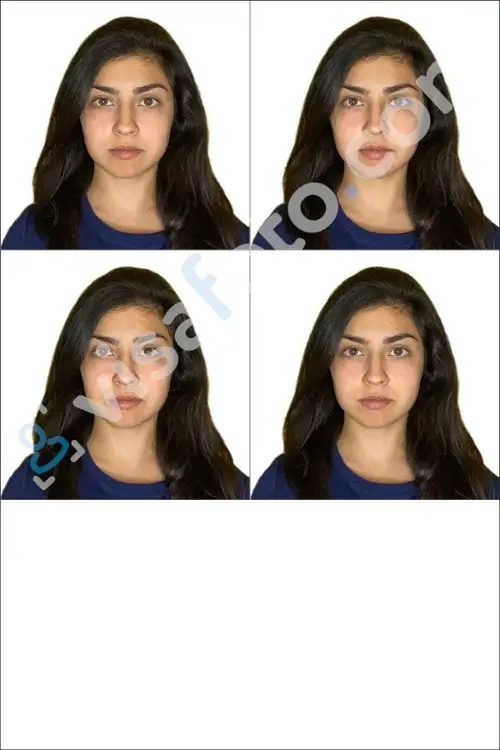
With each order, Visafoto provides two versions: a digital file for online submission and a print-ready layout with multiple photos on a single sheet. You can print this template on a color printer at home or follow this guideline on how to print a passport photo using online services.
For best results, start with a selfie taken in daylight, like this one:
Within a few seconds, you will receive a processed image that looks like this:
Common mistakes to avoid
Over-editing the photo
One of the most common errors when turning a selfie into a passport photo is excessive retouching. Passport photos must reflect your real appearance — including natural skin texture, facial proportions, and neutral tones. Filters that smooth skin, alter colors, reshape features, or add artificial enhancements create an unrealistic look, and biometric scanners are likely to flag them.
If editing is necessary, keep it minimal. Adjustments such as correcting exposure, reducing shadows, or straightening the frame are acceptable as long as they don’t modify your face. Avoid tools that whiten teeth, sharpen eyes excessively, remove moles or scars, or modify facial contours. A slightly imperfect but natural-looking photo is far better than an edited image that looks artificial.
Overprocessing may lead to rejection, requiring you to retake and resubmit your application. Staying true to your natural look ensures your selfie-based passport photo remains authentic and compliant.
Using untrustworthy or low-quality editing tools
Not all apps and editors are built for ID photos. Many programs are designed for social media aesthetics rather than biometric accuracy, and may output files with incorrect dimensions, a blurry background cut-out, wrong DPI settings, or unstable color balance. Even slight mismatches — such as head being too large, background not uniform, or file size exceeding limits — can cause the document office to reject the picture.
Choosing a reliable tool helps avoid these pitfalls. Visafoto is specifically optimized for official document processing and formats photos according to each country’s requirements, ensuring proper head size, resolution, and background consistency. The service comes with a 100% acceptance guarantee: if your photo is not approved, Visafoto will provide a free replacement or a full refund. In case of questions or special requests, you can always reach 24/7 support.
Last updated: 2025-12-09